todos with id, title, and user_id columns. We want users to only have access to their own todos. This is how we would do it:
user_id must be equal (_eq) to the authenticated user’s ID (x-hasura-user-id).
What is x-hasura-user-id?
x-hasura-user-id is a permission variable that is used to create permission rules. Permission Variables come from the session’s access token. You can add custom permission variables to create more complex permission rules unique to your project.
Permission Variables
You can add your own permission variables through the Nhost Dashboard under Settings -> Roles and Permissions -> Permission Variables. All variables are available in users’ access tokens which means you can use them when defining permissions for the GraphQL API.Example
Let’s say you add a new permission variablex-hasura-company-id with path user.company.id. Nhost Auth will get the value for x-hasura-company-id by generating and running the following GraphQL query:
JSONPath
We leverage JSONPath to extract the data which means you have a good amount of flexibility. To help you build your queries you can leverage the following playground. Just remember to skip$. when configuring them.
Example
Let’s say you have a permission variablex-hasura-organization-ids, the path should be, e.g., user.profile.organizations[*].id.
This will result in the following GraphQL query internally:
This example is very useful for those building multi-tenant applications.
Limitation on JSON/JSONB columns
JSON columns cannot be used in custom claims, except theusers.metadata column.
Permission Variables locally with the CLI
To use permission variables locally, add your claims tonhost.toml as follows:
Example
Add a permission variablex-hasura-organization-id:
nhost.toml
Roles
Every GraphQL request resolves permissions using a single role.Default Role
Every user has one default role. The default role is used to resolve permissions if no role is specified using thex-hasura-role header in the GraphQL request.
user is the default role for authenticated users.
Allowed Roles
Every user also has an array of allowed roles. Allowed roles are roles that the user is allowed to use to override the default role when making a GraphQL request. To override the default role, add a headerx-hasura-role = <role> to the GraphQL request.
Public Access and Unauthenticated Users
GraphQL requests from unauthenticated users resolve permissions using thepublic role.
Insert Permissions
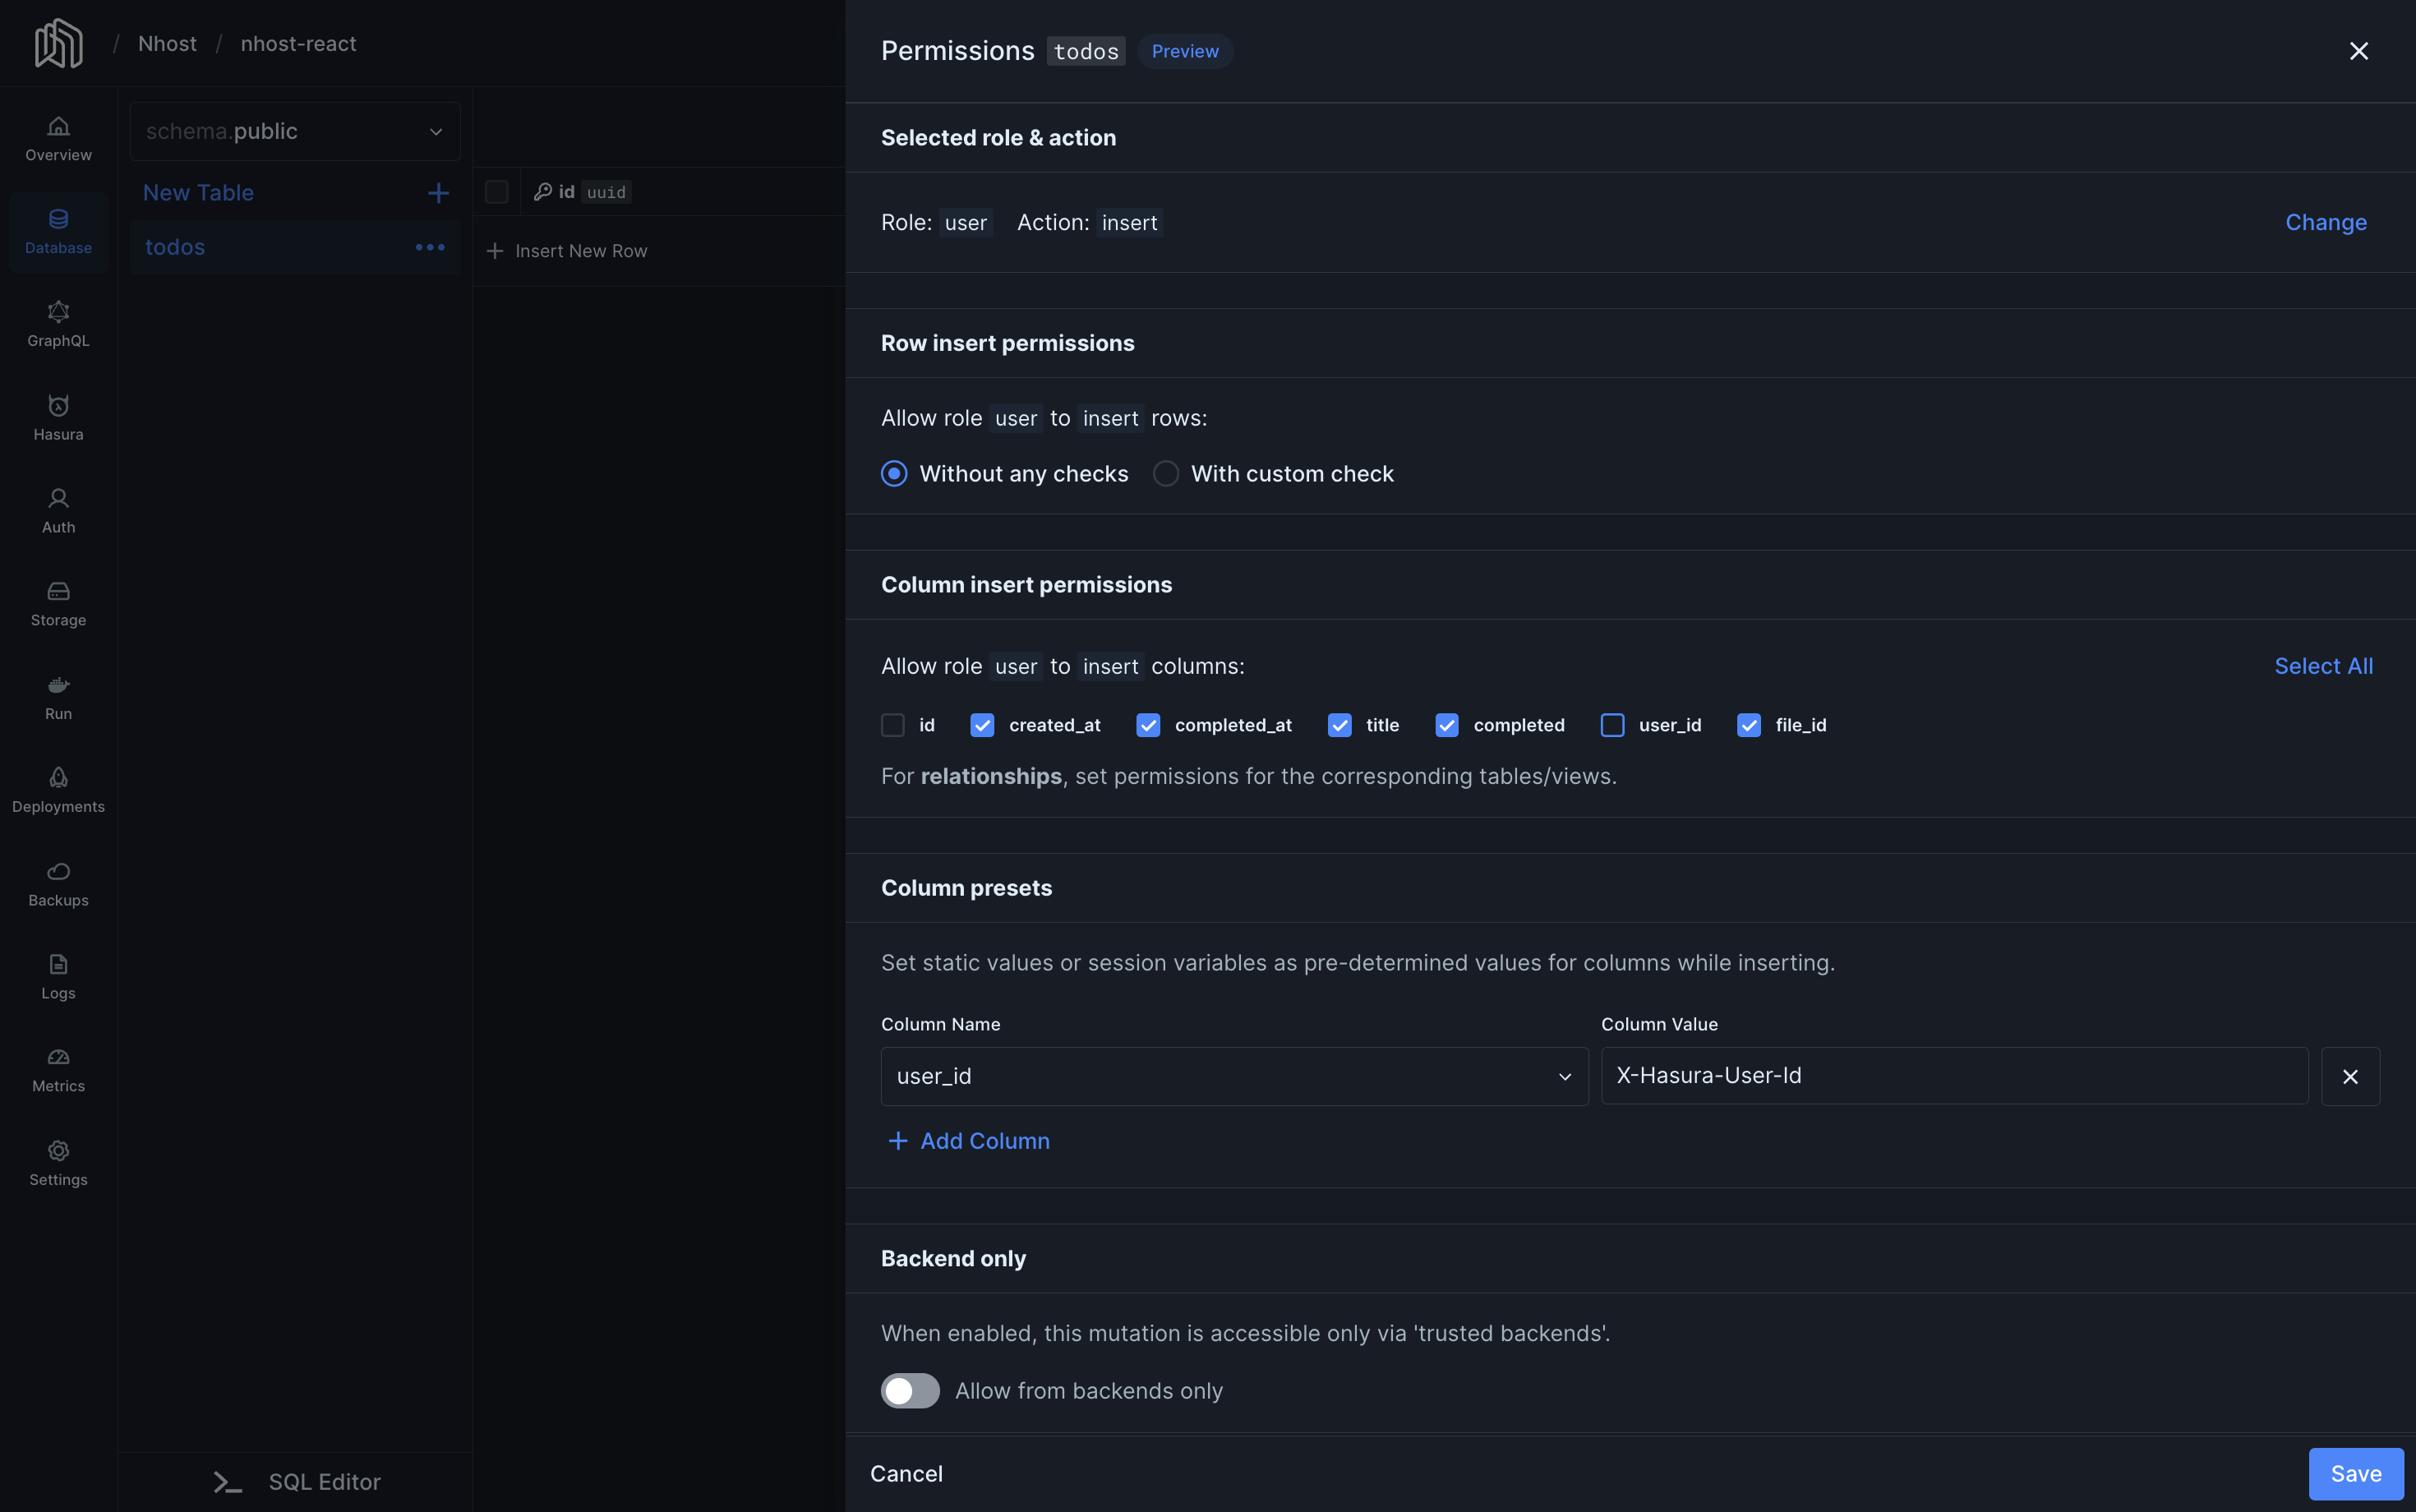
- At the top of the page, click “insert” on the “user” role.
- Select “Without any checks”.
- Select the columns you want to allow users to insert. In our example, we do not mark
idnoruser_id, because they should not be inserted by the user. Theidis automatically generated by the database anduser_idis set using a column preset. - Under Column presets, set
user_idtox-hasura-user-id. This way, every new record’suser_idvalue is set to the ID of the user making the request.
id is automatically generated by the database and the user_id is automatically set to the user’s id using the user_id = x-hasura-user-id column preset.
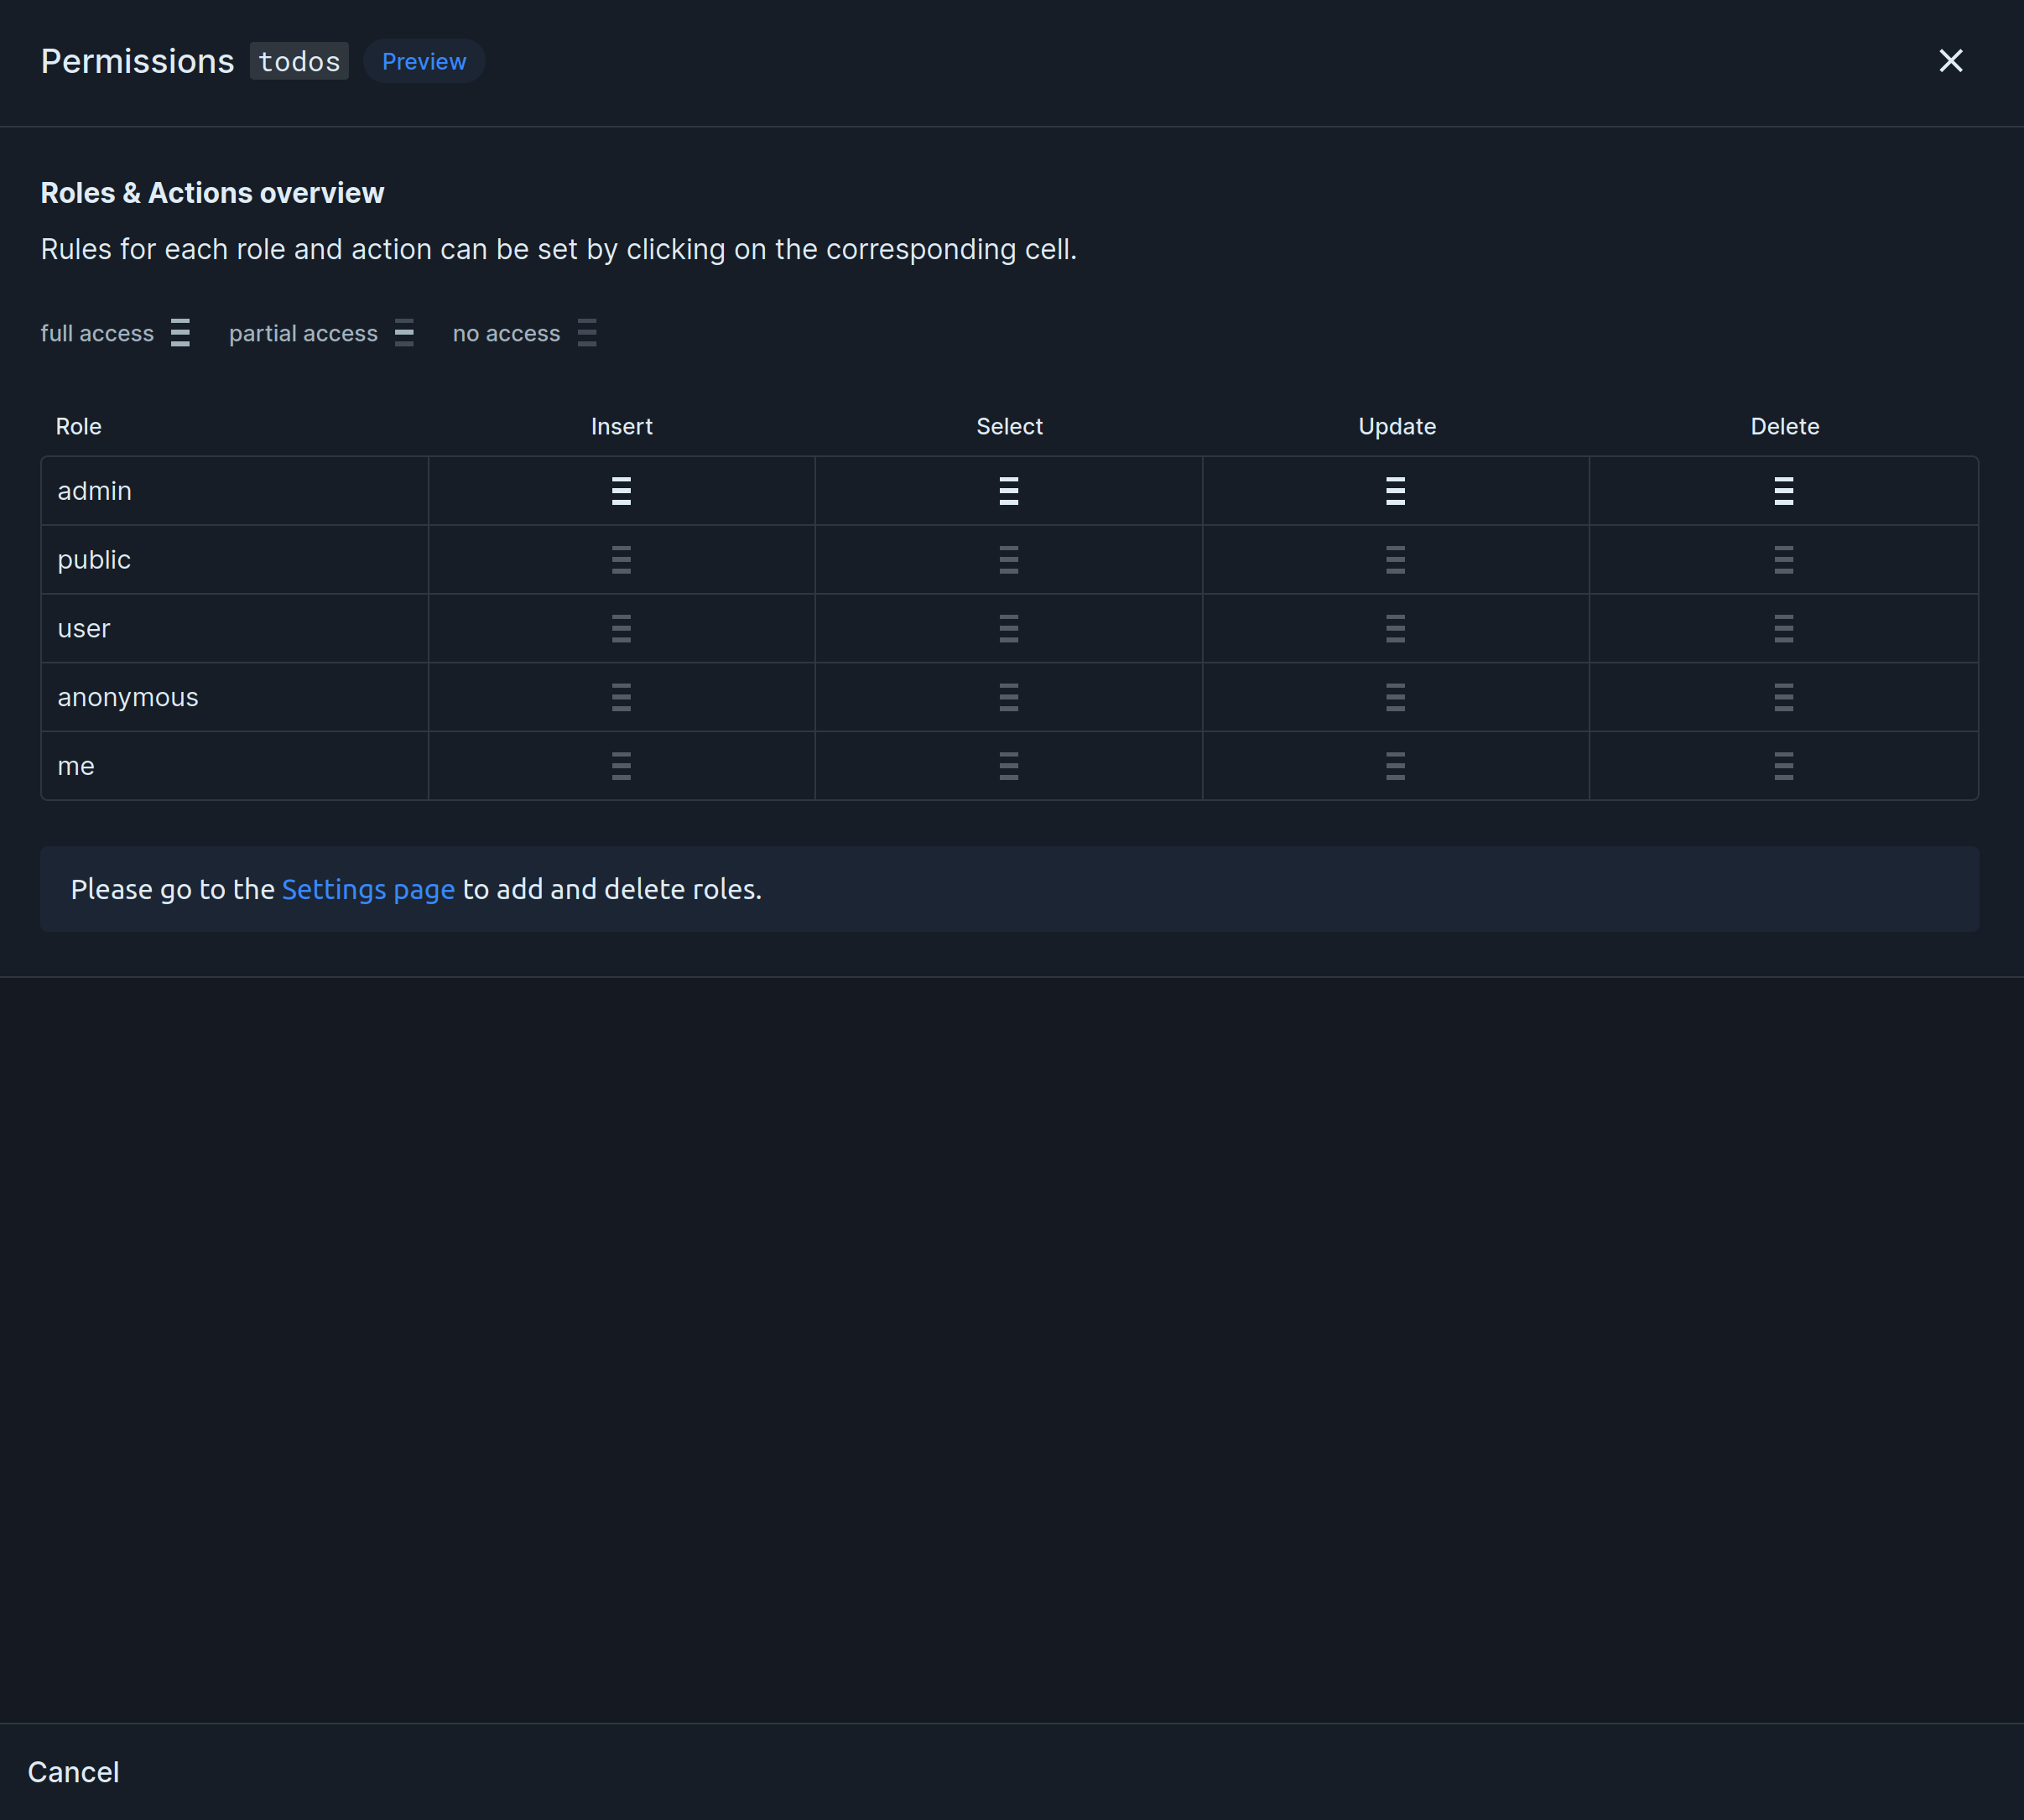
Select, Update and Delete Permissions
Select, update, and delete permissions usually follow the same pattern. Here’s an example of how to add select permissions: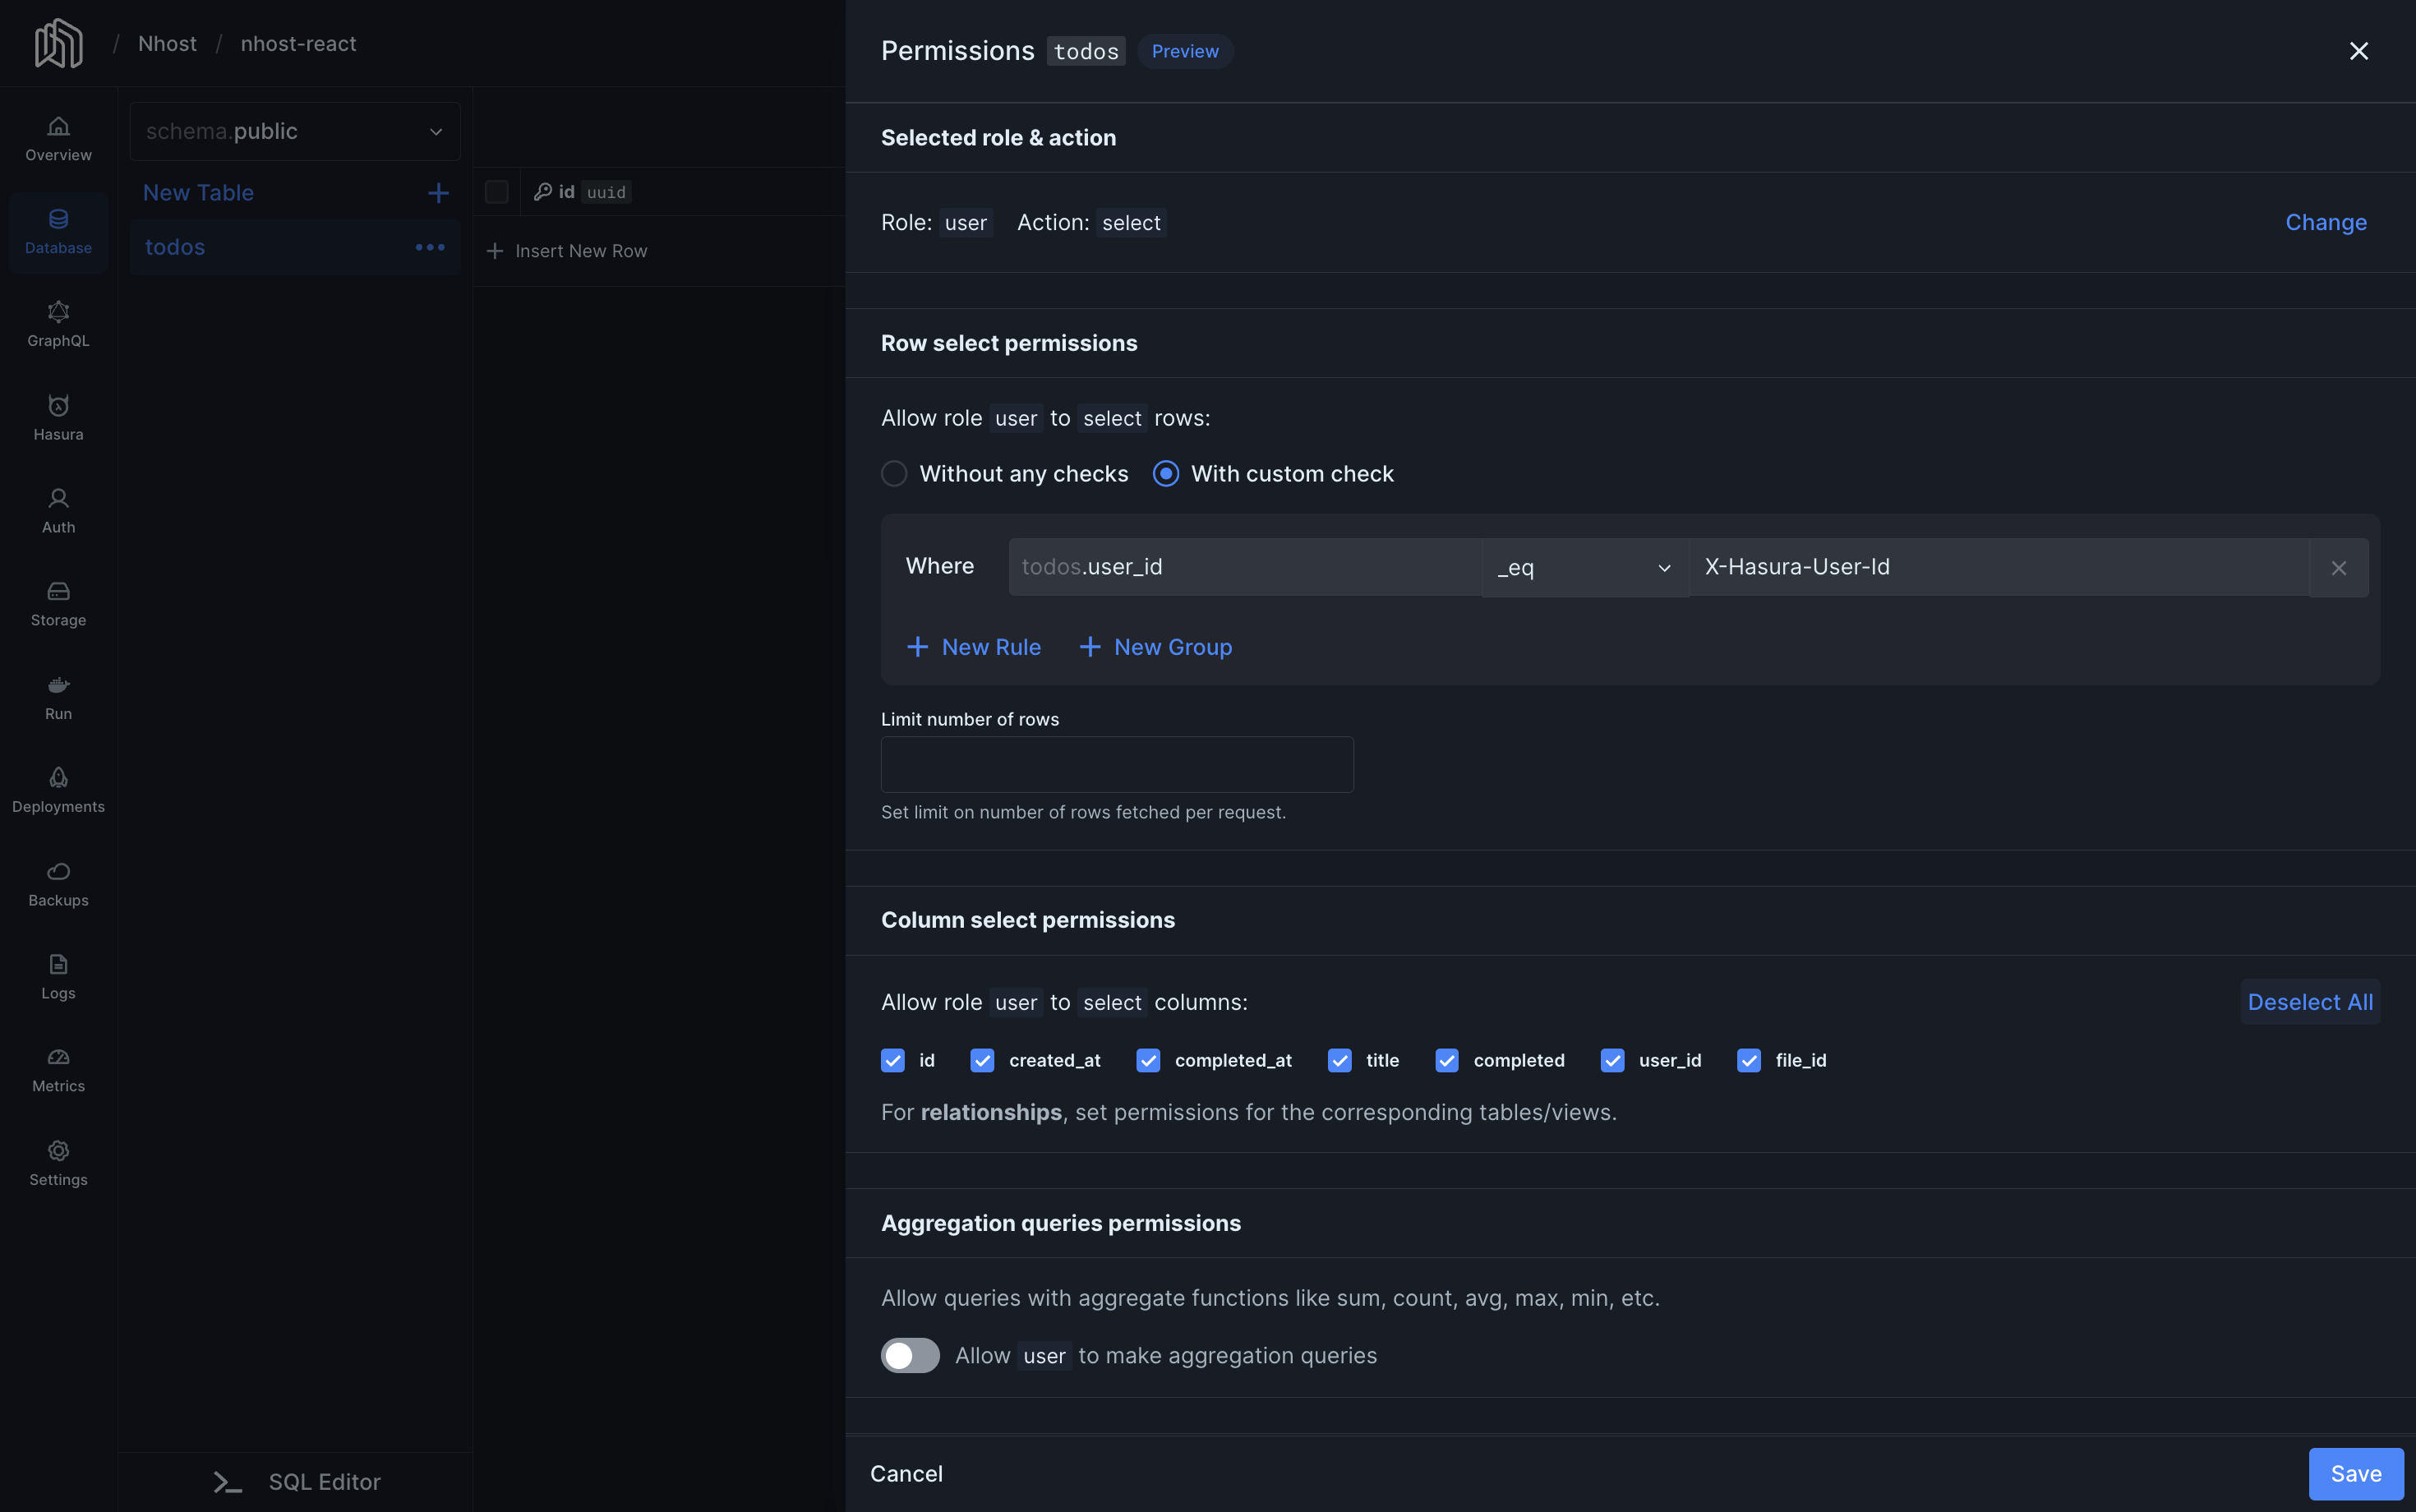
- Go to the Database section in the Nhost Dashboard.
- In the context menu of the table you want to edit, click on Edit Permissions.
- Click on the role and operation you want to set.
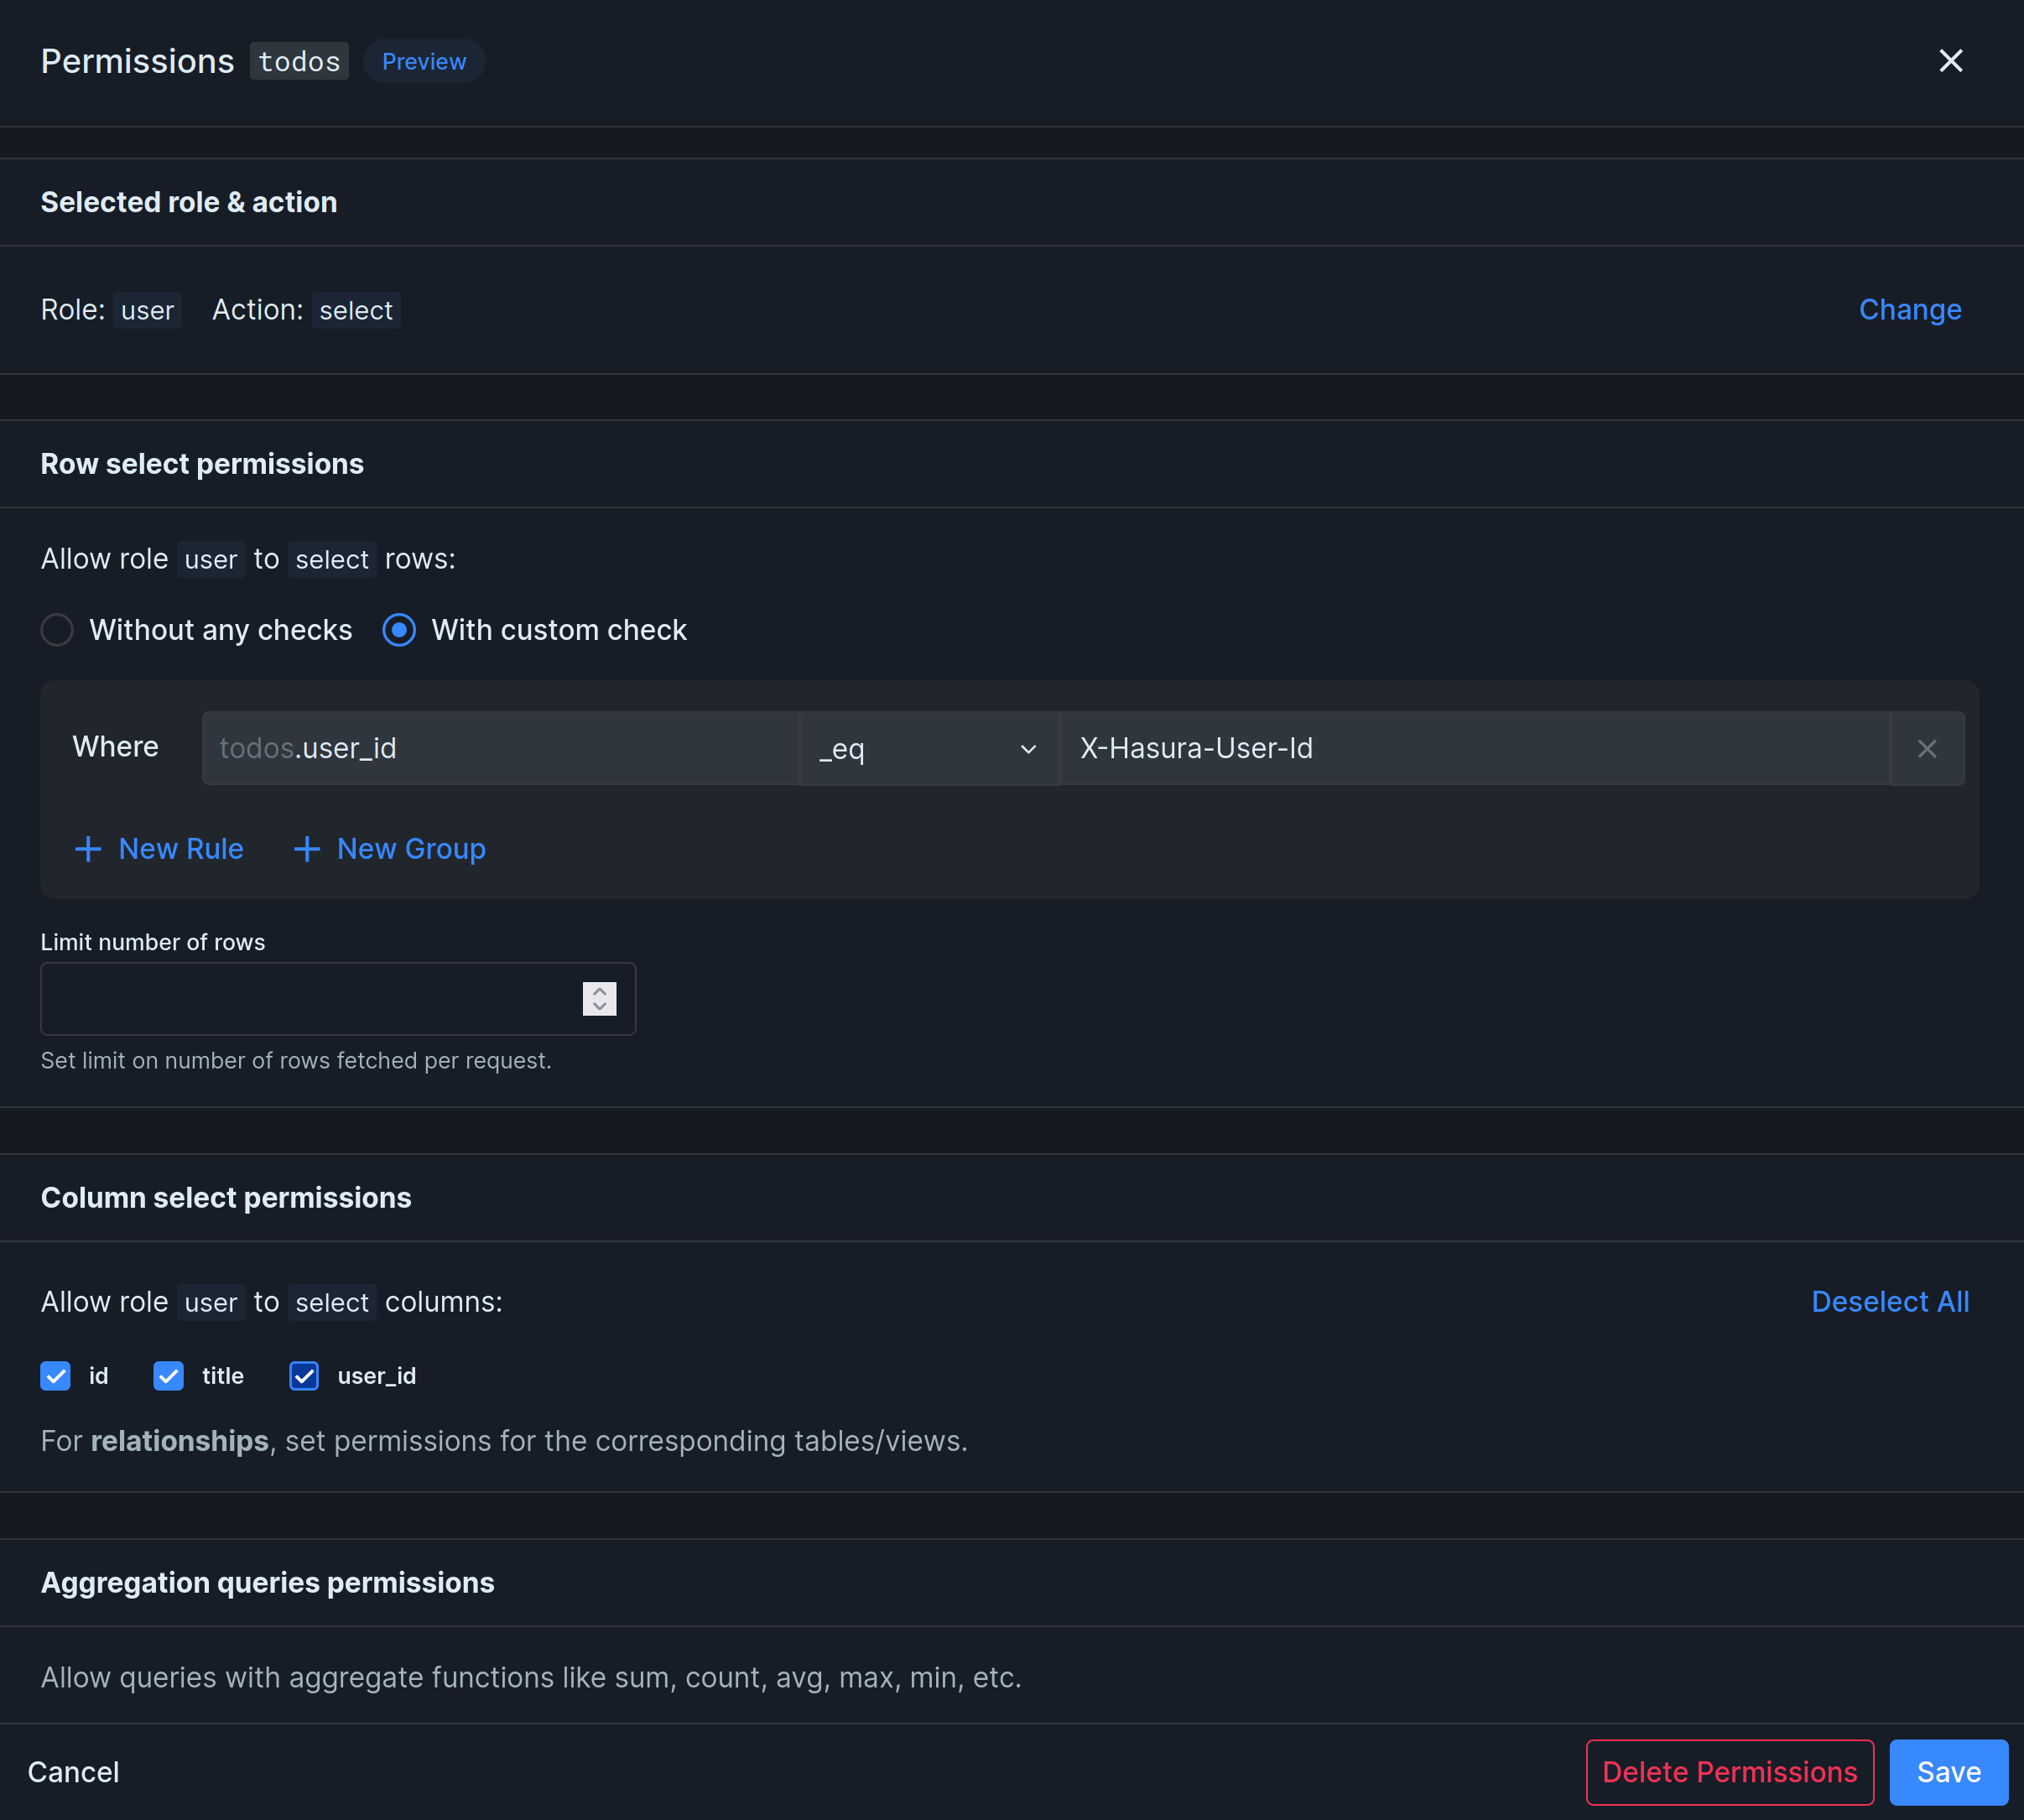
- Select “With custom check” to create a new rule
- Enter
user_id,_eqandx-hasura-user-idinto the rule form. This means that in order for users to read data, the user ID value in the database row must be the same as the user ID in the access token. - Limit the number of rows to 100 (or some other relevant number).
- Select the columns you want the user to be able to read. In our case, we’ll allow the user to read all columns.
- Click Save.