Create Project
If you haven’t, please create a project through the Nhost Dashboard.
Setup Database
Navigate to the SQL Editor of the database and run the following SQL to create a new table 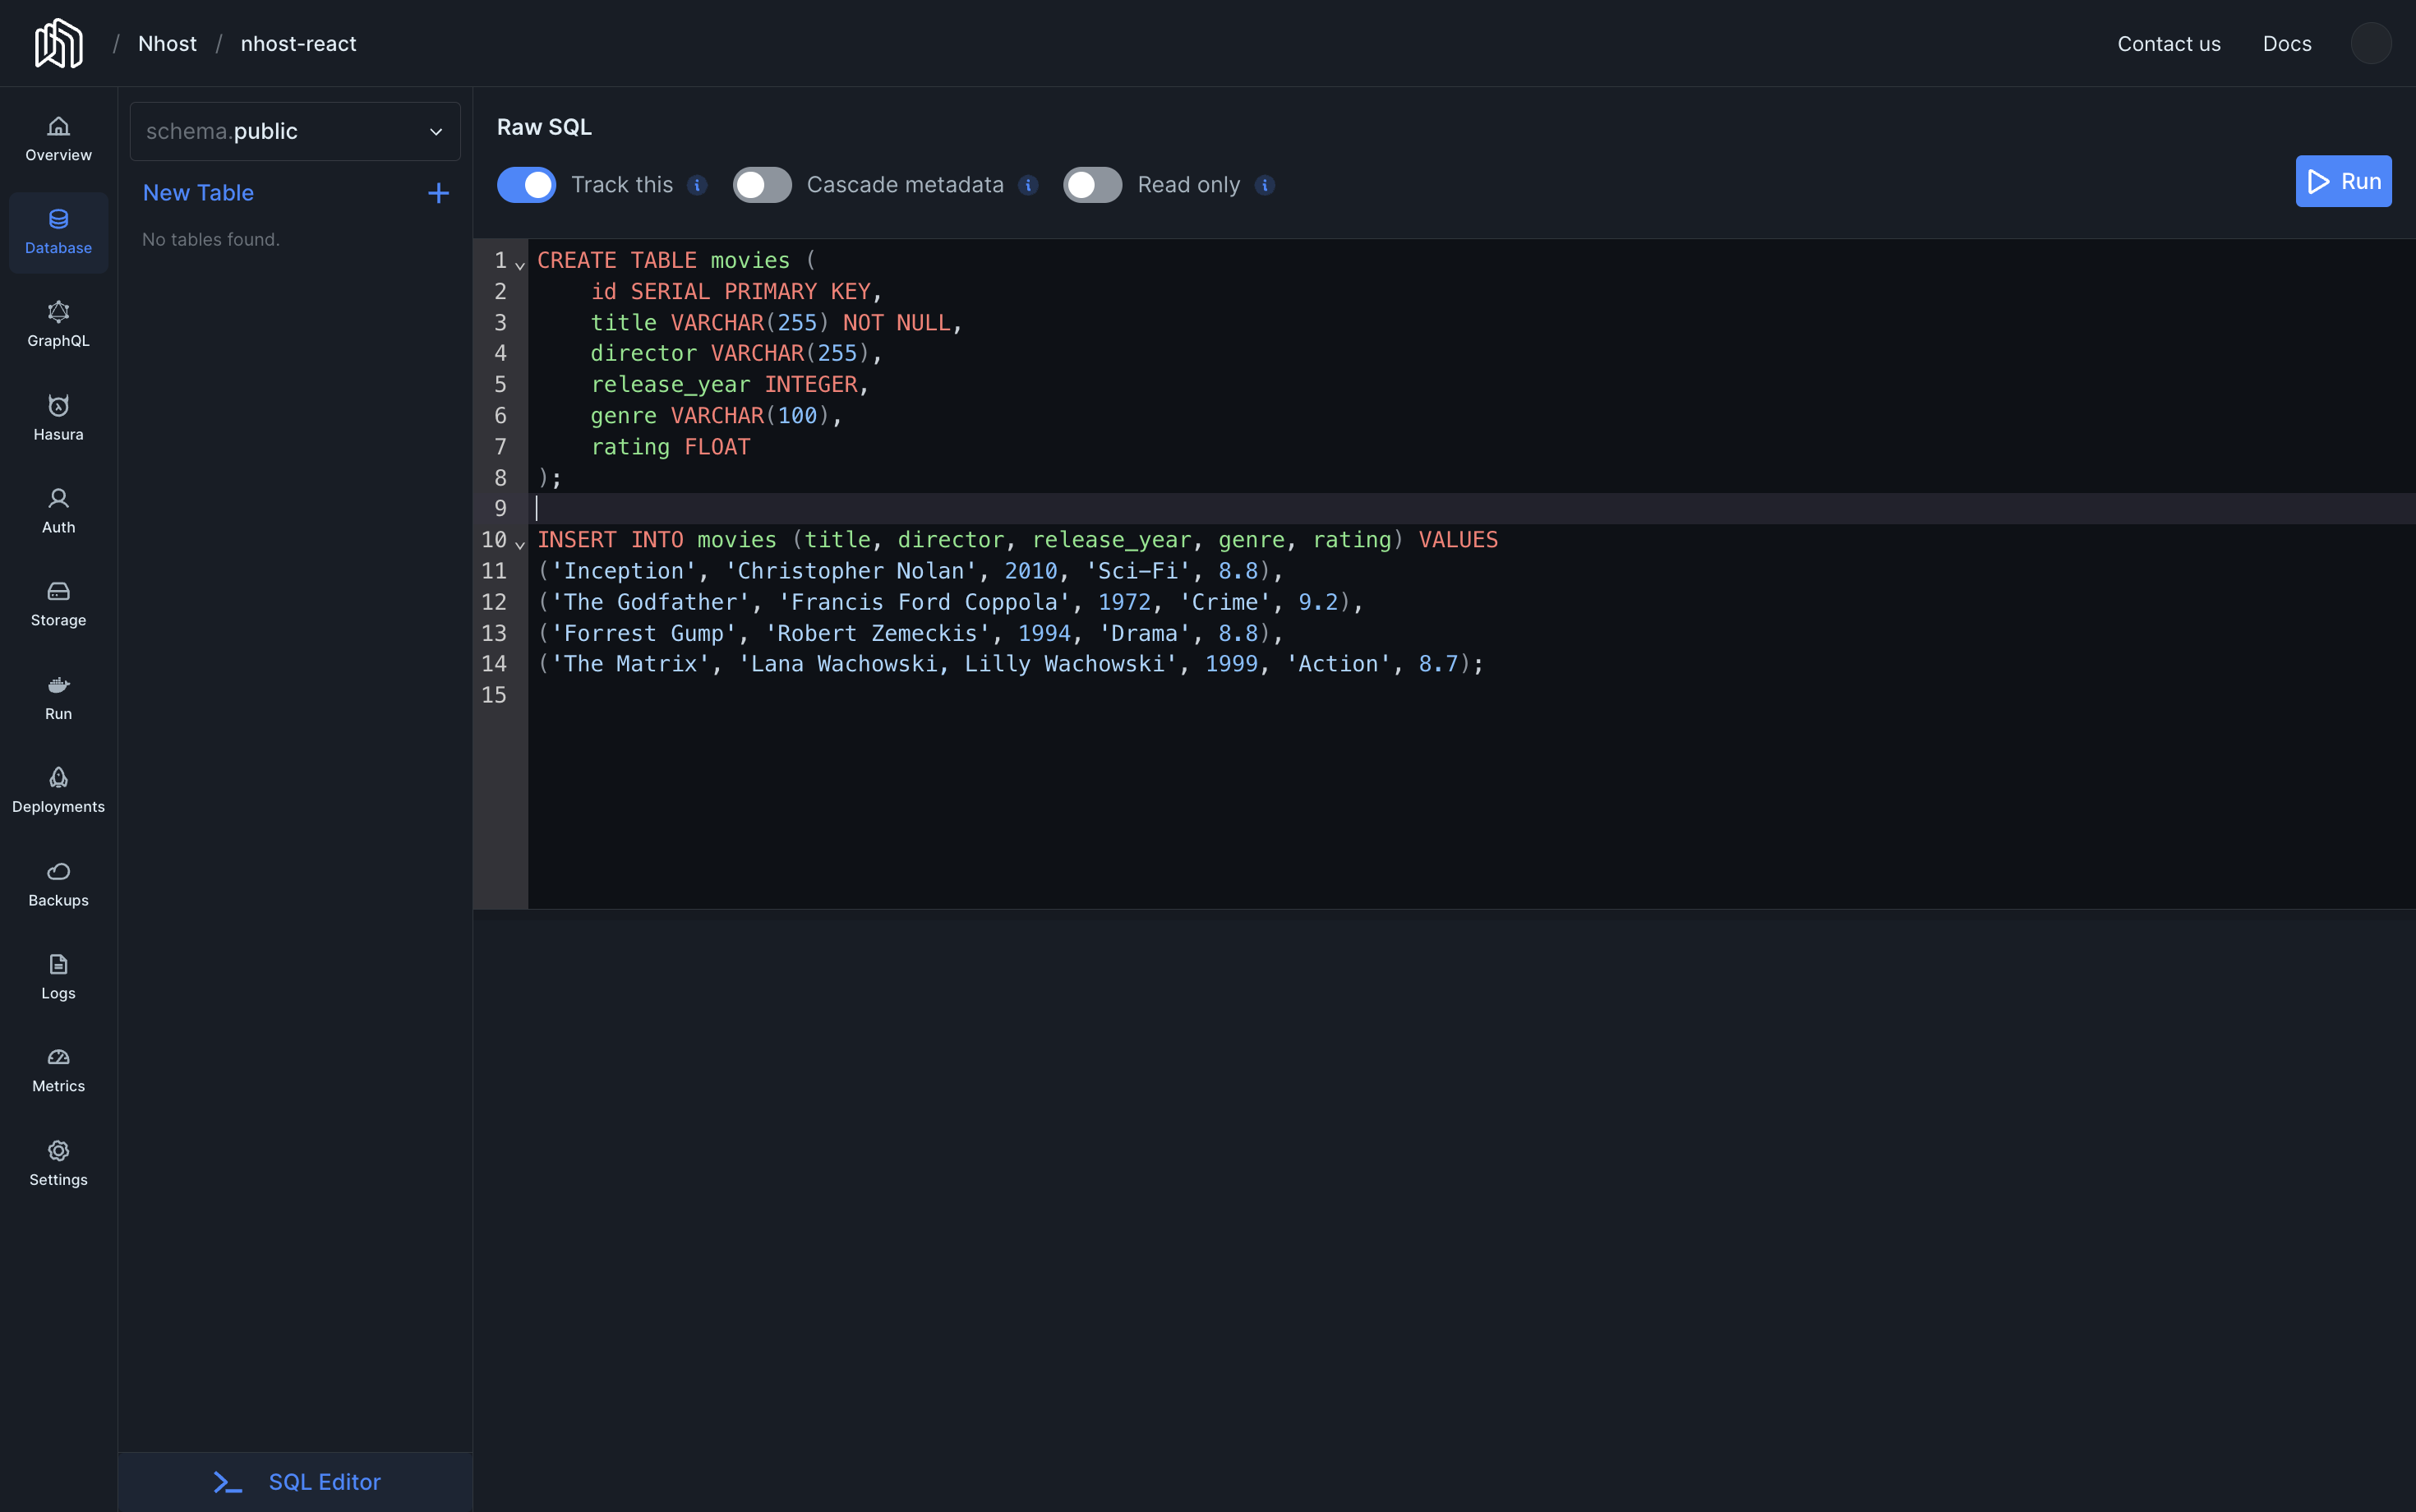
movies with some great movies.SQL Editor
Permissions
Select the new table 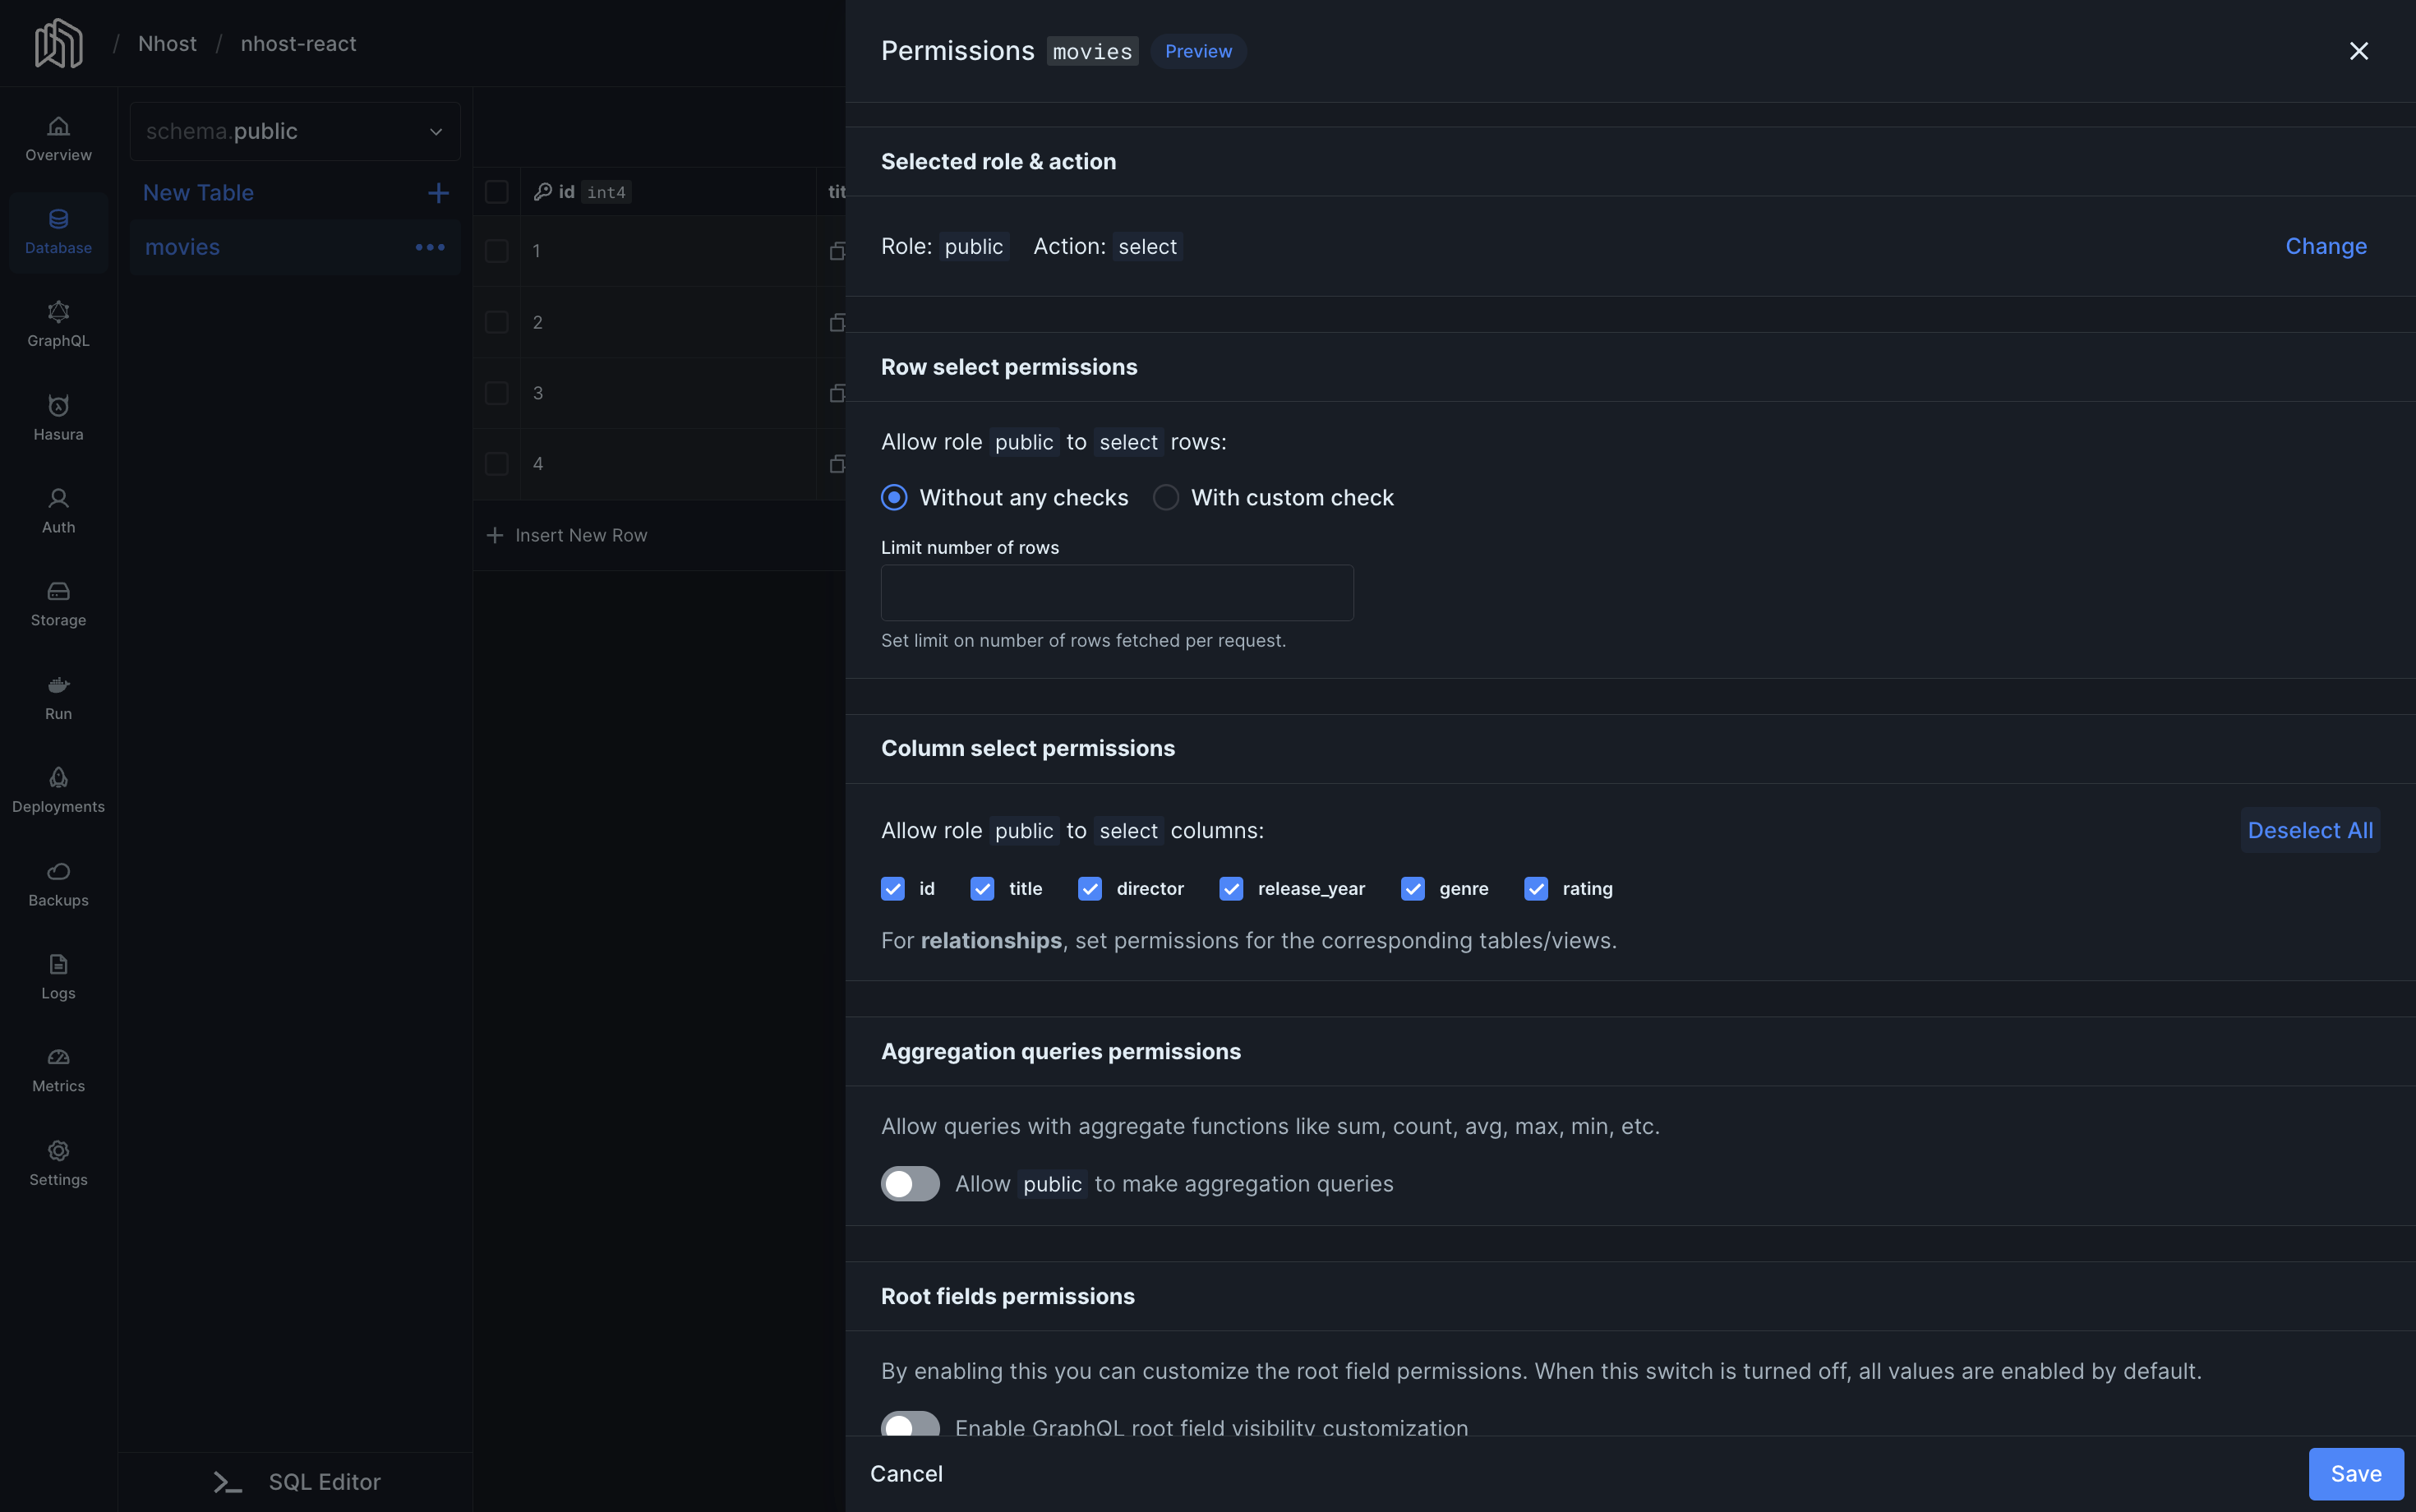
movies just created, and click in Edit Permissions to set the following permissions for the public role and select action.